After installing cypress on windows if a user is getting the below error message to open cypress then need to perform step 1 and step 2 to resolve the cypress verification time out issue
Package.json is a file found in all npm packages and is normally found in the project root.
It contains various metadata about the project.
This file provides information to npm so that it can identify the project and handle its dependencies.
It can also contain other metadata, such as a project description, the project’s version.
A Node.js project’s package.json file is usually found in the root directory.
This example of package.json file used for writing code using cypress
{“devDependencies”: {“cypress”: “9.5.2”}}
What are devDependencies in the package.json file?
Dependencies are specified with a simple hash of package name to version range. The version range is a string that has one or more space-separated descriptions. Dependencies can also be identified with a tarball or gitUrl.
devDependencies: Packages that are only needed for local development and testing.
What is tarball?
The tarball is a compressed file format. You need to unpack it before running the npm command.
What is "dependencies" in package.json file?
"dependencies": Packages required by your application in production.
If you spend time on the internet and browse websites. Then this post will assist you in determining where you spend the majority of your productive time.
So to identify result like below follow the steps as mentioned
To analyze the google chrome history browser file here are the steps.
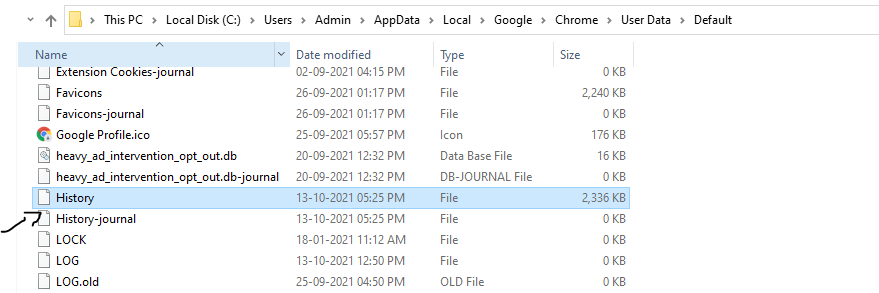
Step 4) Copy History File to any other Location you want
Chrome History file location
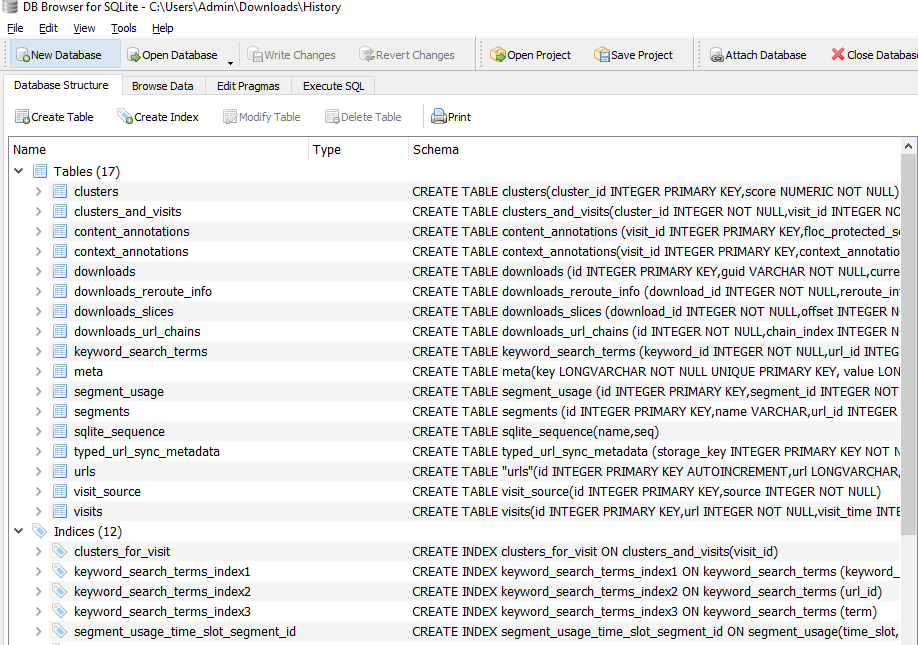
Step 5) Now open the history file in DBBrowser SQLite. By Clicking on Open Database menu and providing History file where you copied in step 4.
History File in SQLite DB Browser
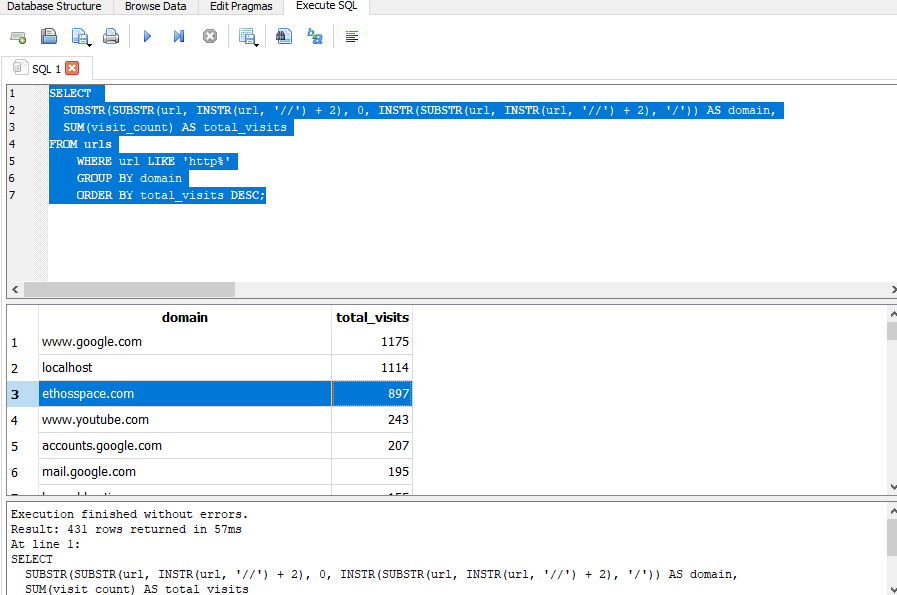
Run below Query in Execute SQL Tab
SELECT
  SUBSTR(SUBSTR(url, INSTR(url, '//') + 2), 0, INSTR(SUBSTR(url, INSTR(url, '//') + 2), '/')) AS domain,
  SUM(visit_count) AS total_visits
FROM urls
    WHERE url LIKE 'http%'
    GROUP BY domain
    ORDER BY total_visits DESC;
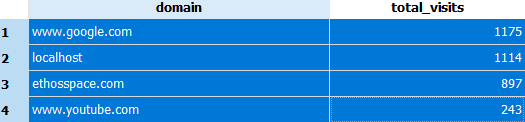
By Executing the above query you will get results like how many times you are visiting a specific website.
Also we by using SQL Queries we are able to fetch the time invested on each website.
Below are some predictions and analysis for a couple of years from now mainly the year 2022 for the software testing Testing industry.
The software industry is transforming in terms of technology like IoT. Development methodology like DevOps.
The given information is based on individual analysis and expertise achieved while working over a decade.
Looking at the current trend it clearly shows Software Development Engineers in Test roles will be in demand. in place of plain software tester role. The candidate who can participate in the development and test the application as well will have more preferences than traditional testers. A person who has manual testing skills along with Business domain, Black Box testing, design, and programming skills will have more preference.
Many Open source tools are capturing the huge testing market share. Tools like selenium, cypress, Katalon are widely accepted by the industry. Job trends show the open-source tools have more requirements as compared to commercial.
There is smart shifting going on from traditional testing to smart quality engineering. A person having multiple skills like Exploratory testing, Automation testing, a Business analyst with basic development knowledge will be preferred.
In the fast-changing technology world, the customer is looking for the very early to go in the market. So Those who are having the best QA practices like continuous testing with less time by providing the highest quality will have more chances to win projects. Speed and quality will be the key this year. To achieve this one should have good testing knowledge along with continuous automation testing.
As digital transformation is key to success so person or company who provides services that help customers to launch applications or products in very little or reduced time. In this digital world amount of digital data is getting produced continuously each year. For big players like Facebook, what’s app, Microsoft, apple, google data is key. So certainly big data testing will be in trend.
As the IoT industry is also growing so IoT testing will be in demand. As per Gartner
The worldwide government Internet of Things (IoT) endpoint electronics and communications market will total $21.3 billion in 2022, according to Gartner, Inc. This is a 22% increase from a forecasted total of $17.5 billion in 2021.
DevOps is providing faster and quality deployment also this is a cost-effective solution. Testing with DevOps will be more important. Companies that are having the process to deploy products using DevOps by maintaining high-quality communication across teams will be more successful.
The conclusion is software Testing is growing but the role of a software tester is getting changed in terms of skills.
Everything you need is to adapt modern skills of testing which lead to success in the year 2022.
Once the Downloaded file is ready for example Git-2.34.1-64-bit.exe then double click on it.
Click on the Next button for General Public license Window
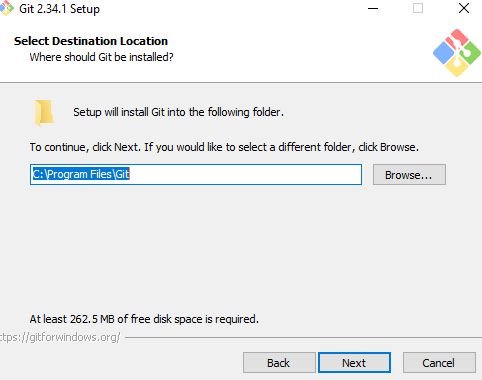
Select Destination Location folder where git has to install locally and Click on the Next button.
local git path
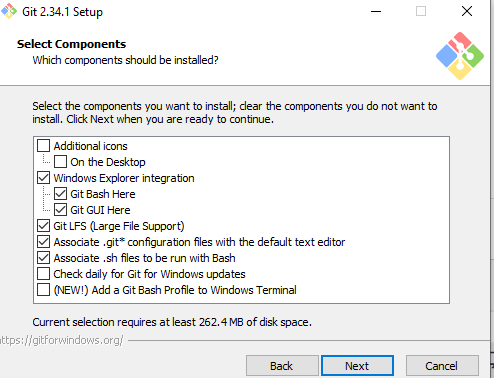
Click on the Next button
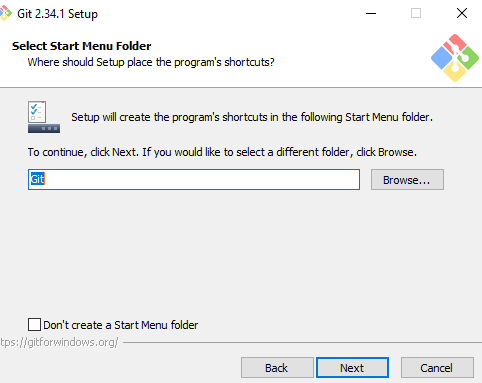
Click on the Next Button to select program shortcut.
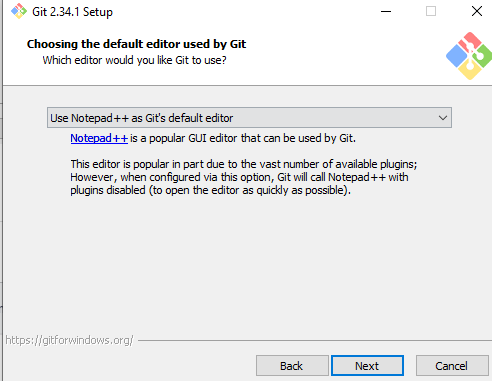
Select any Default Editor option from the dropdown. (Whichever editor is available on the system) and Click on the Next button.
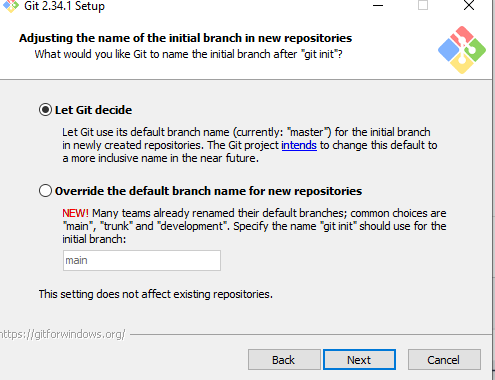
Click on the Next button and let git decide to use the default branch name.
Click next to adjust path environment (Keep recommended as it is)
Keep Default option selected for “Use Open bundled SSH”, “Use the open SSL Library” “Checkout Windows-style” Use MiniTty, and continue to click on the Next button unless you get the install button. Click on Install Button and wait for setup to complete.
Provide necessary information like new username (check for existence), Email Address, and Password
GitHub Will ask to verify the Account. After successful verification account will get created. The free account gives 500 MB space.
Note down your username and password.
Let’s create a simple project locally and upload it on github.
Create a Folder in any drive locally.
Here we are creating a folder in E Drive
E:\Github_C_Program
Open Visual Studio Code and using “File -> Select Folder” Menu select the folder which you created ( for example above we are selecting E:\Github_C_Program)
Local folder in GitHub
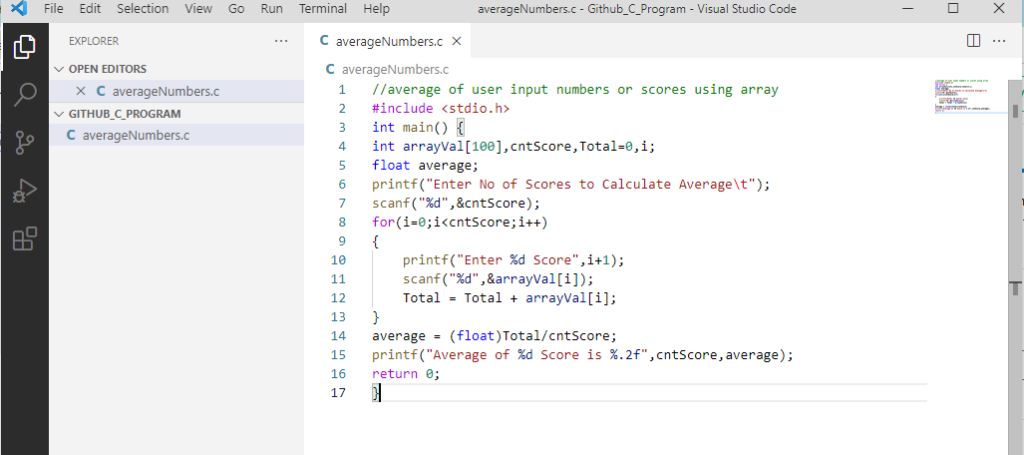
Click on New File and Add any html, java, php, c language code in that file and name is accordinly.
Here we have created c program file and added some code in the file
Now we need to upload the above C Project to Github. To perform that we need to
Initialize Repository
Commit Code
Config git (First Time)
Add Remote (Location)
Push Code to Git Hub
First time it will ask to provide GH login password
If require PUsh code again.
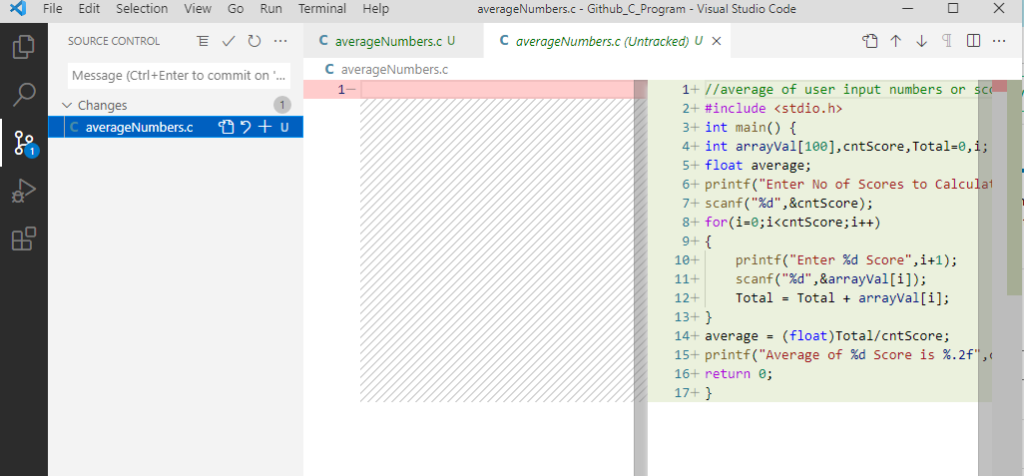
Click on Source Control and Click on Initialize Repository.
The system will display similar files which are available in the projects folder
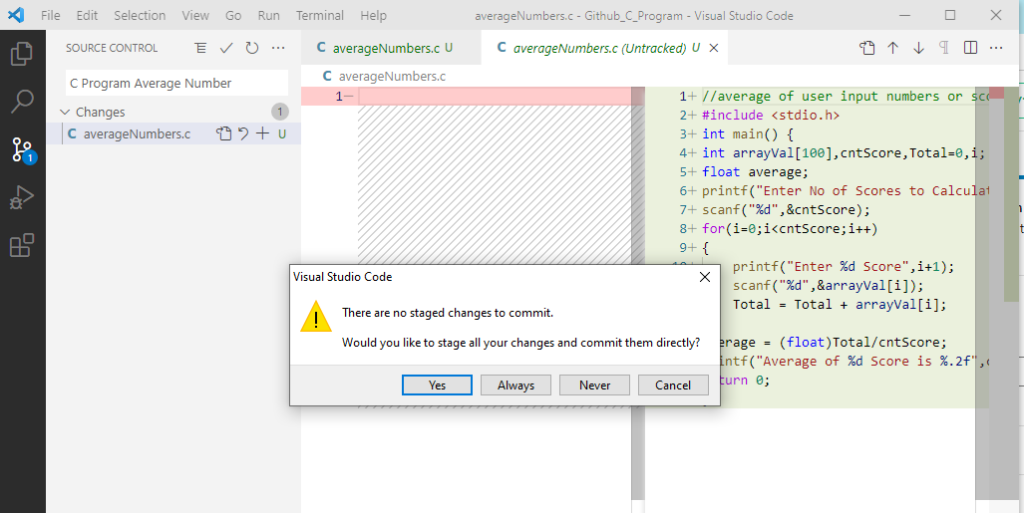
Click on the Commit button (Richt Check Sign) and provide the necessary comment in the message section.
Click on Yes Button so that it will ask always before committing.
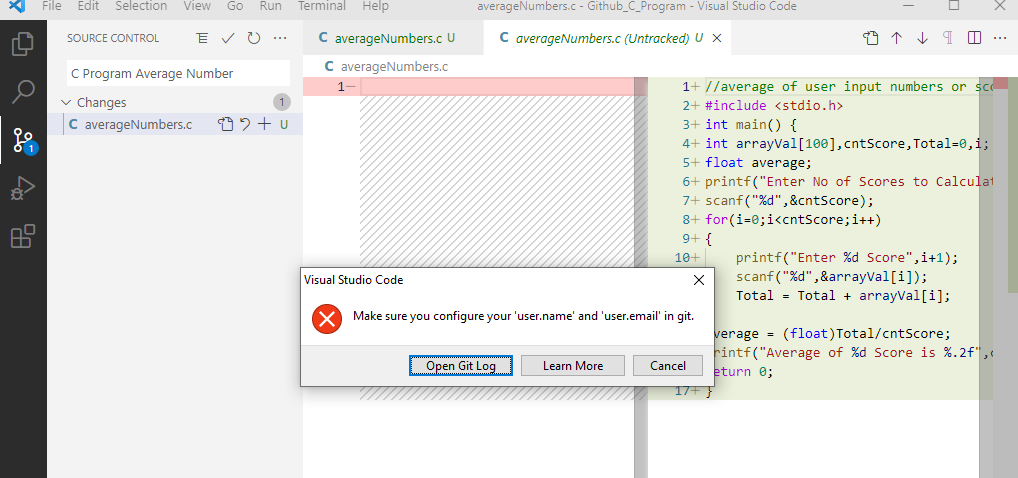
The system will throw an error message as git is not configured with VS Code.
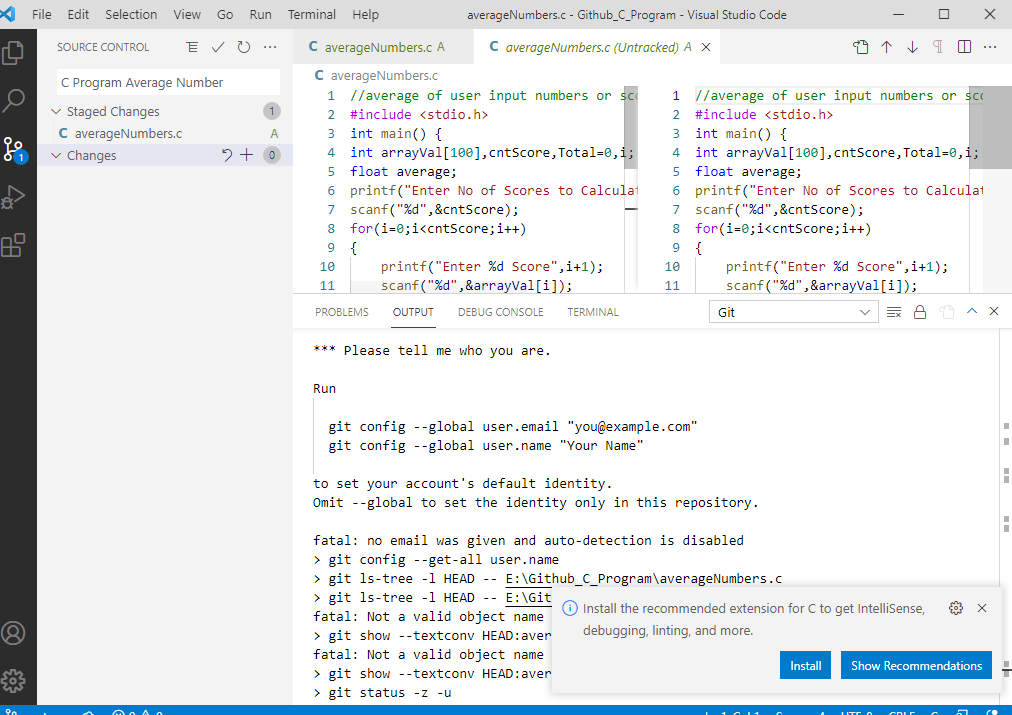
In this situation click on Open Git Log button. An editor will display log information in Output Tab like below
To config studio with git permanently you need to run the below command on the Git Command prompt.
git config –global user.email “you@example.com”
git config –global user.name “Your Name”
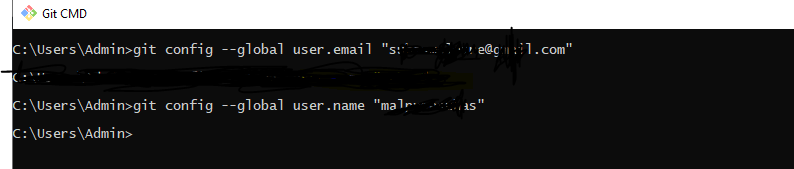
Make sure to replace the correct email ID which you used while creating GitHub Account
Type Git CMD” in Search and open Git CMD Prompt. By replacing the appropriate email id and Name run the command one by one like below.
Now Go to Visual Studio Editor Again and click on commit again. If you observe code is committed successfully locally.
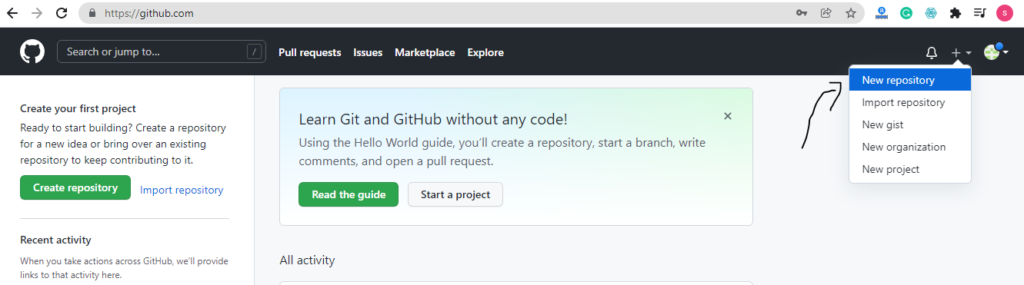
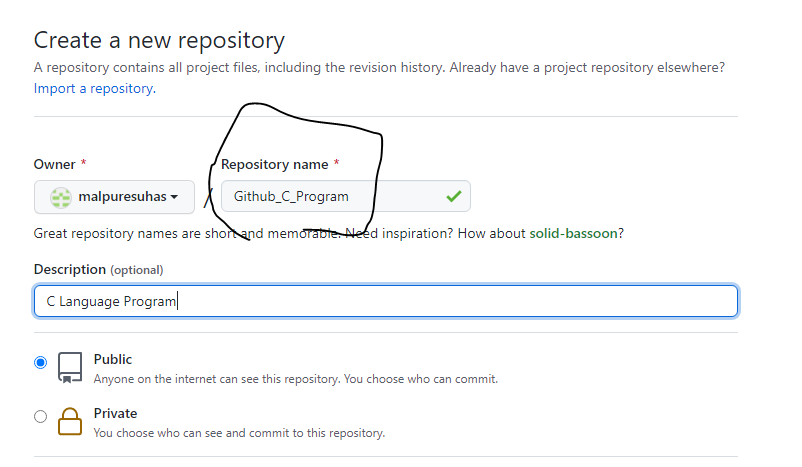
to Push it to Git Hub we need to create one Repository. To do this login to https://github.com/. We have already created a username and password in earlier steps. Click on the New Repository menu as shown below.
Provide Repository Name same as project Name like below
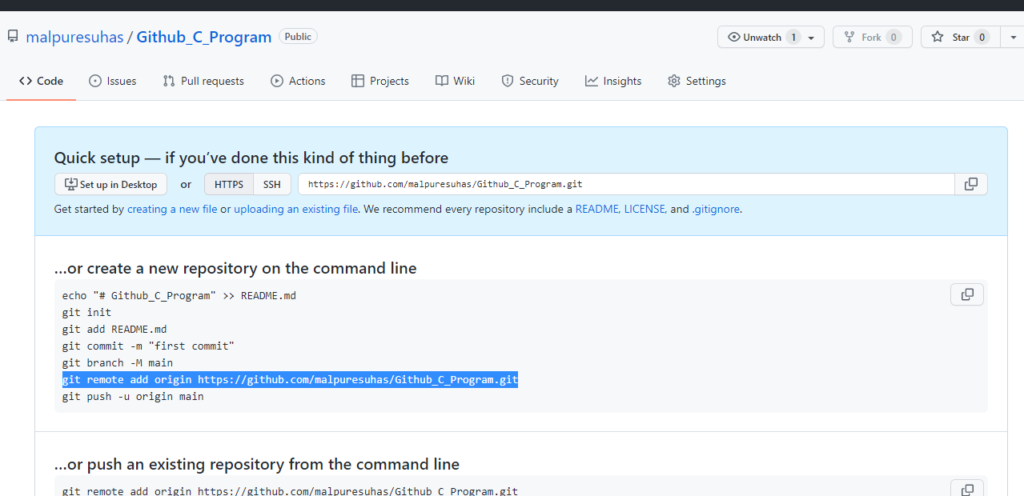
After Clicking on Create New Repository Button GitHub will display the below message.
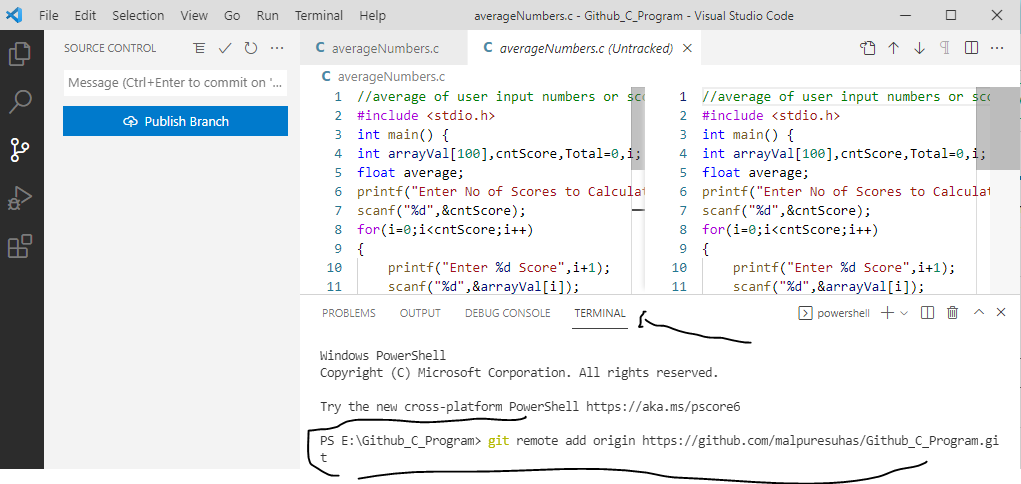
Copy the Above highlighted line ( Make sure it should contain your project name and username) and past it on visual studio code terminal and press enter. like below
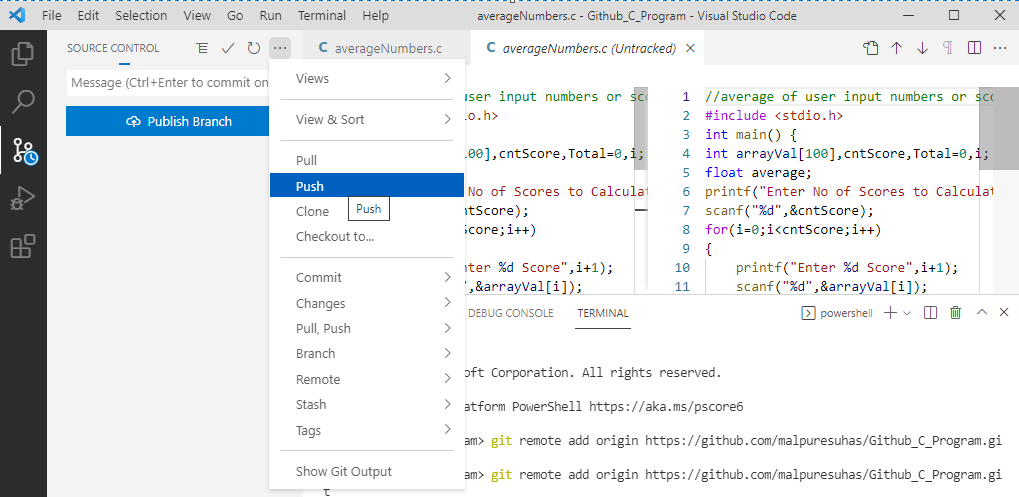
Now Visual Studio Code is now aware of where it has to push the code. So click on the menu mentioned below to push the code
The first time it will ask you user name and password again. You can provide it if asked.
To conclude after performing every step as mentioned as shown above it will be easy to configure Visual studio code with GitHub.
Once both cypress and Editor are available on the machine then perform the below steps.
Step 1) Open Visual Studio Code.
Step 2) Create a new folder to store the project files or Open any existing project folder to store files.
Step 3) Click on New File menu as shown below.
New file Code
Step 4) Type package.json and save it.
Step 5) In Package.json file need to mention cypress for dev dependency. To do this we have multiple ways. From Terminal Menu Click on New Terminal Menu. We can use this terminal within IDE.
Terminal within IDE
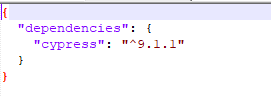
Step 6) Type command “npm install –save-dev cypress” on Terminal and Wait because this will search for package.json file to install the dev dependencies. so add the below code in a package.json file (use IntelliSense if require to type)
“devDependencies”: { “cypress”:”^9.1.1″ }
While writing this blog 9.1.1 was the latest version so use IntelliSense to get the latest version in place of copy-paste.
Save the file and Hit the command “npm install –save-dev cypress” on the terminal.
The terminal will display the below message after installation
PS E:\Cypress Projects> npm install –save-dev cypress npm WARN deprecated querystring@0.2.0: The querystring API is considered Legacy. new code should use the URLSearchParams API instead.
added 163 packages, and audited 164 packages in 49s
24 packages are looking for funding run npm fund for details
found 0 vulnerabilities PS E:\Cypress Projects>
Installing Cypress Dev Dependencies from Termal using Code Editor.
The above command will install the latest version of cypress within your project.
All helpful methods after pressing dot in code editor are coming from node_modules -> @types -> index.d.ts file.
Successful installation of cypress with dev dependencies within the project folder using the code editor.
Step 7) How to create Cypress package
In Terminal type command “npx cypress open” and press enter.
It will show a message like this
It looks like this is your first time using Cypress: 9.1.1
Solution for the above error is Relaunch cypress one more time. If that doesn’t work then change
VERIFY_TEST_RUNNER_TIMEOUT_MS value to 100000 Which is by default is 30000. ” VERIFY_TEST_RUNNER_TIMEOUT_MS ” is available under verify.js file located “node_modules\cypress\lib\tasks\verify.js” Save the changes and type command “npx cypress open” and press enter.
After successful configuration, the user will see cypress Test runner window like below.
cypress window after successful configuration and installation with code
Step1) Open command Prompt (type cmd in search and press Enter)
Step 2) Type command ” npm uninstall cypress”
The system will start uninstalling cypress and will show the below message.
C:\Users\Admin>npm uninstall cypress
removed 163 packages, and audited 1 package in 15s
found 0 vulnerabilities
Step 3) If you get below error then try to navigate to the directory where cypress is installed from the command line
npm ERR! code EPERM npm ERR! syscall mkdir npm ERR! path E:\ npm ERR! errno -4048 npm ERR! Error: EPERM: operation not permitted, mkdir ‘E:\’ npm ERR! [Error: EPERM: operation not permitted, mkdir ‘E:\’] { npm ERR! errno: -4048, npm ERR! code: ‘EPERM’, npm ERR! syscall: ‘mkdir’, npm ERR! path: ‘E:\’ npm ERR! } npm ERR! npm ERR! The operation was rejected by your operating system. npm ERR! It’s possible that the file was already in use (by a text editor or antivirus), npm ERR! or that you lack permissions to access it.”
Step 4) Navigate to the directory where cypress is installed using the cd command in the command line
Step 5) Type command “npm uninstall cypress” and press enter
After a couple of seconds, the system will uninstall cypress and will show the below message.
removed 163 packages, and audited 1 package in 6s
found 0 vulnerabilities
If you want to reinstall cypress from step 1 on windows then follow the article install cypress on windows.
To remove dependencies from the package.json file we can use the command “npm uninstall <name> –save”
This will uninstall cypress and also remove dependencies from the package.json file.
Users can install cypress on windows by giving the single command “npm install cypress”. But to run this command it is important that npm is installed on the machine.
How to check if npm is installed on the machine or not?
Navigate to command prompt and type command npm -v
If windows show any version then npm is installed on a machine. If no version is specified then follow the article to install npm on windows.
Once NPM is available on windows then type the command “npm install cypress” and press enter.
After successful installation type command “npx cypress –version” and press enter to check if cypress is installed or not.
Cypress is capable to test anything which runs on a chrome browser. The architecture surrounding Cypress is built to handle modern JavaScript frameworks.
Cypress is the best tool to automate web app built on the latest React, Angular, Vue, Elm, etc. frameworks.
Cypress is easy to install just by using the command “npm install cypress”
Do not compare cypress with selenium. Both have different architecture to identify elements. End to end Web automation is possible with cypress. Cypress can perform unit testing, Database Testing, UI Testing.
Cypress is an open-source front-end testing tool built for modern applications.
Cypress is not selenium. Cypress is built with the new architecture. Cypress uses the same run-loop in place of communicating with different drivers like selenium.
Cypress does not depend on third-party drivers.
When users want to automate any project then they have to install Frameworks like mocha, jasmine , QUnit, Karma.