Here will see the end-to-end installation and project configuration of the project using VS Code and GitHub.
To configure Git with Microsoft Visual Studio Code Editor one must have
- Visual Studio Code
- Git source control
- Git Hub Account
Let’s see in detail how to install, and Set up Git with Microsoft Visual Studio Code Editor.
Download and Install Visual Studio Code.
The first thing to remember is to download any software from its official website only.
From the official site download, visual studio code set up, and perform the setup by clicking on the Next button.
the official site is Visual Studio Code – Code Editing. Redefined.
Download and Install Git Locally on System.
To download an open-source version control system locally it is important to download git from the official site Git – Downloading Package (git-scm.com)
Once the Downloaded file is ready for example Git-2.34.1-64-bit.exe then double click on it.
Click on the Next button for General Public license Window

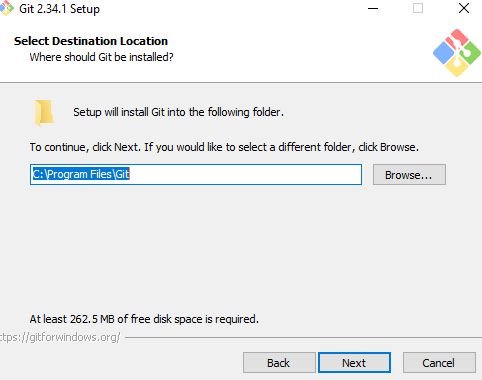
Select Destination Location folder where git has to install locally and Click on the Next button.
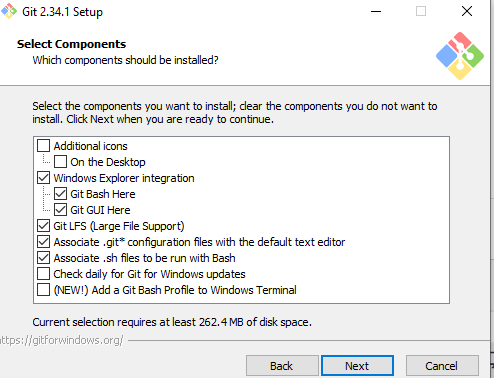
Click on the Next button
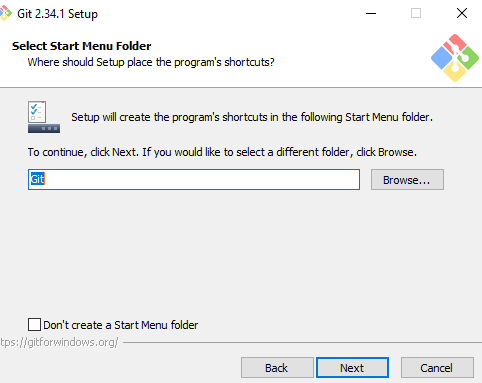
Click on the Next Button to select program shortcut.
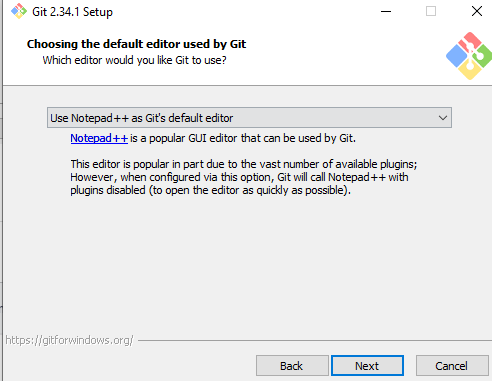
Select any Default Editor option from the dropdown. (Whichever editor is available on the system) and Click on the Next button.
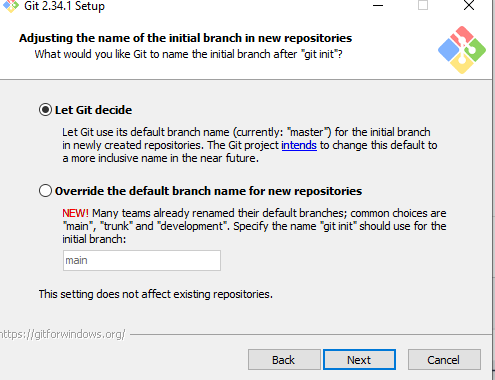
Click on the Next button and let git decide to use the default branch name.
Click next to adjust path environment (Keep recommended as it is)

Keep Default option selected for “Use Open bundled SSH”, “Use the open SSL Library” “Checkout Windows-style” Use MiniTty, and continue to click on the Next button unless you get the install button. Click on Install Button and wait for setup to complete.

Click on Finish Button to Setup Git Setup
Create GITHUB Account
Create a GitHub account by creating a new user at https://github.com/join
Provide necessary information like new username (check for existence), Email Address, and Password
GitHub Will ask to verify the Account. After successful verification account will get created. The free account gives 500 MB space.
Note down your username and password.
Let’s create a simple project locally and upload it on github.
Create a Folder in any drive locally.
Here we are creating a folder in E Drive
E:\Github_C_Program
Open Visual Studio Code and using “File -> Select Folder” Menu select the folder which you created ( for example above we are selecting E:\Github_C_Program)

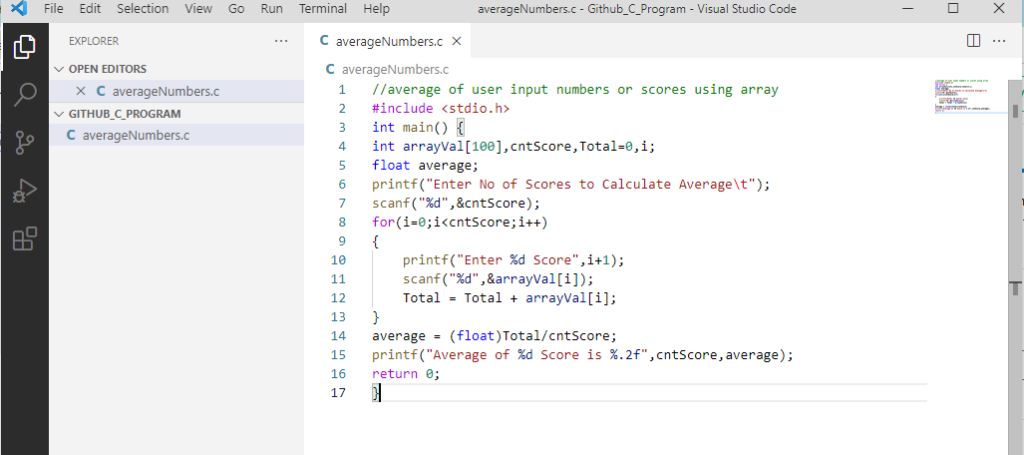
Click on New File and Add any html, java, php, c language code in that file and name is accordinly.
Here we have created c program file and added some code in the file
Now we need to upload the above C Project to Github. To perform that we need to
- Initialize Repository
- Commit Code
- Config git (First Time)
- Add Remote (Location)
- Push Code to Git Hub
- First time it will ask to provide GH login password
- If require PUsh code again.
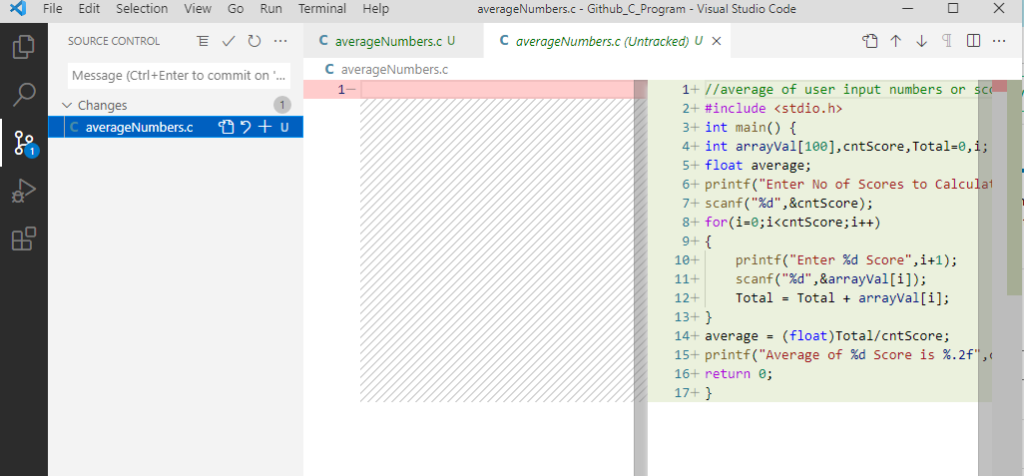
Click on Source Control and Click on Initialize Repository.
The system will display similar files which are available in the projects folder
Click on the Commit button (Richt Check Sign) and provide the necessary comment in the message section.
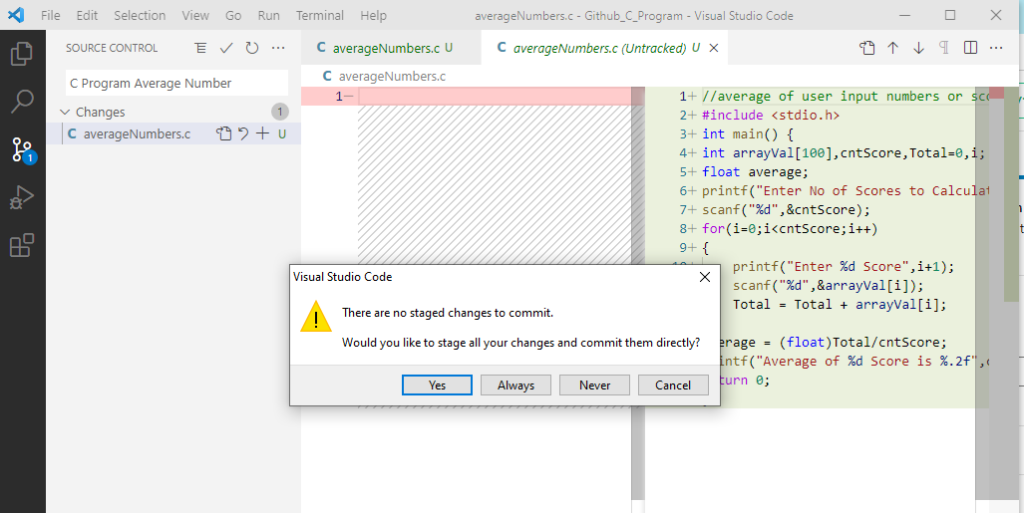
Click on Yes Button so that it will ask always before committing.
The system will throw an error message as git is not configured with VS Code.
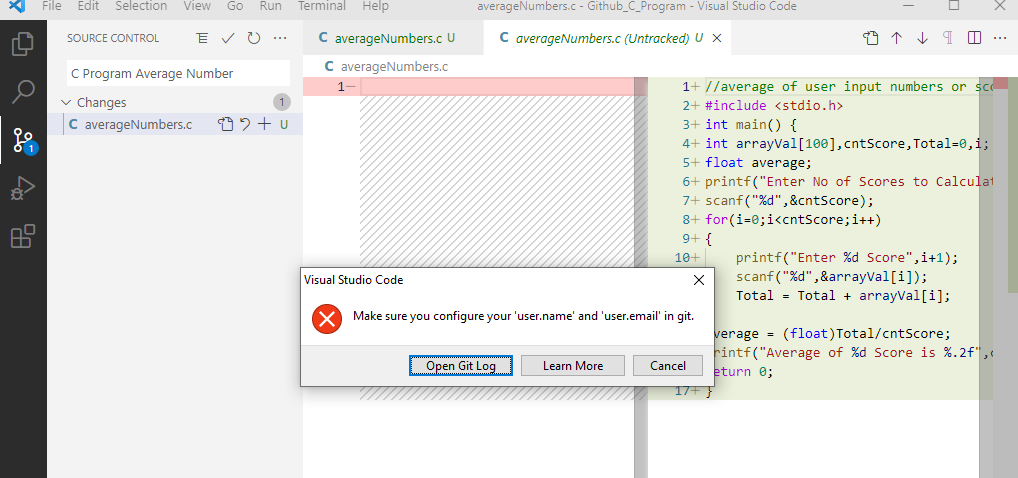
In this situation click on Open Git Log button. An editor will display log information in Output Tab like below
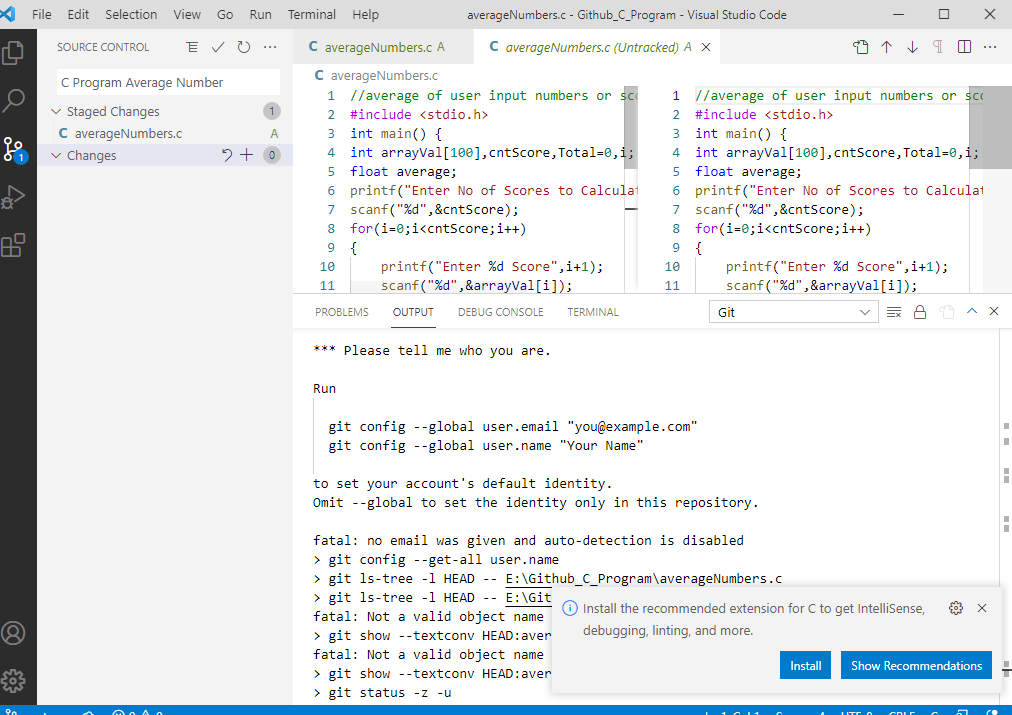
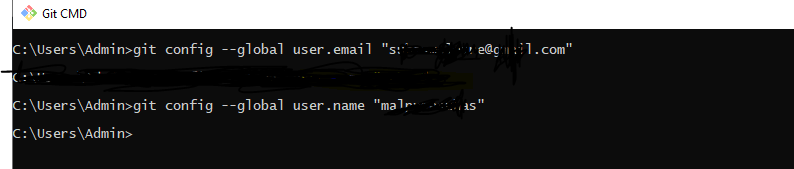
To config studio with git permanently you need to run the below command on the Git Command prompt.
git config –global user.email “you@example.com”
git config –global user.name “Your Name”
Make sure to replace the correct email ID which you used while creating GitHub Account
Type Git CMD” in Search and open Git CMD Prompt. By replacing the appropriate email id and Name run the command one by one like below.
Now Go to Visual Studio Editor Again and click on commit again. If you observe code is committed successfully locally.
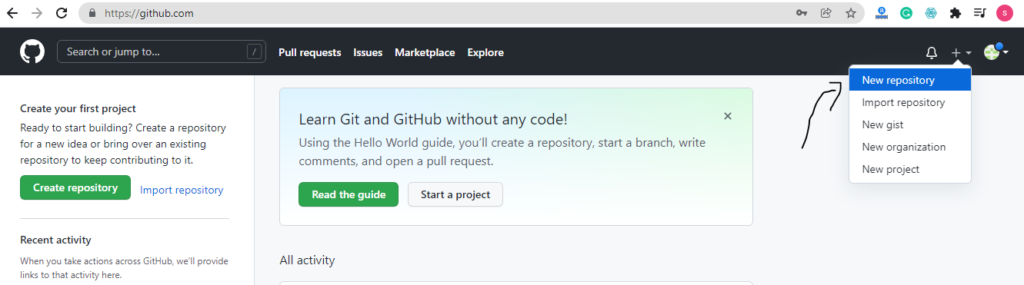
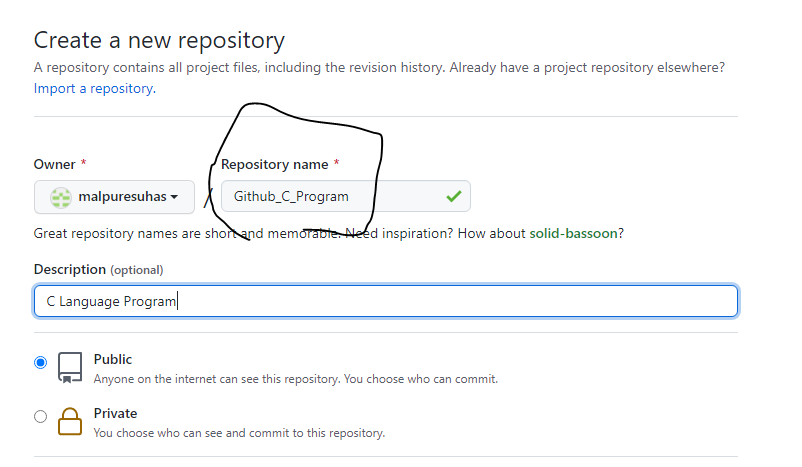
to Push it to Git Hub we need to create one Repository. To do this login to https://github.com/. We have already created a username and password in earlier steps. Click on the New Repository menu as shown below.
Provide Repository Name same as project Name like below
After Clicking on Create New Repository Button GitHub will display the below message.
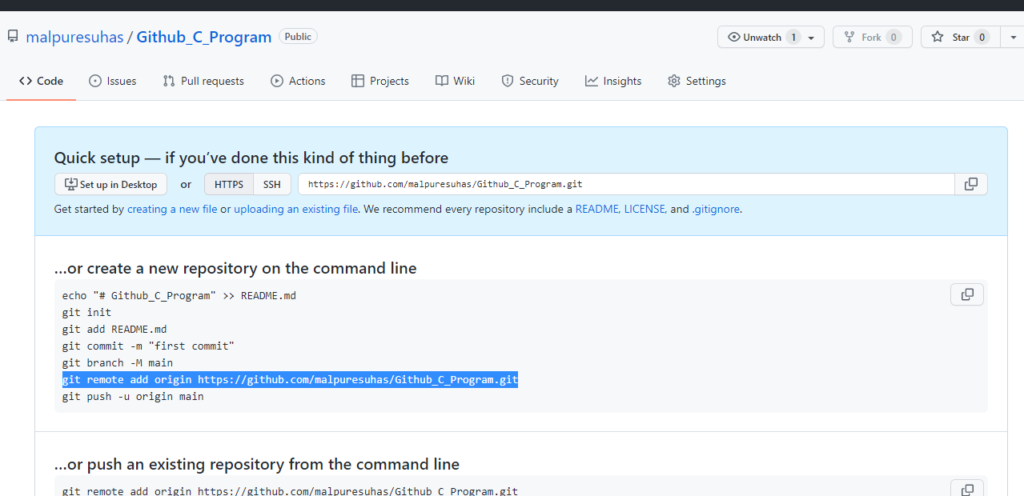
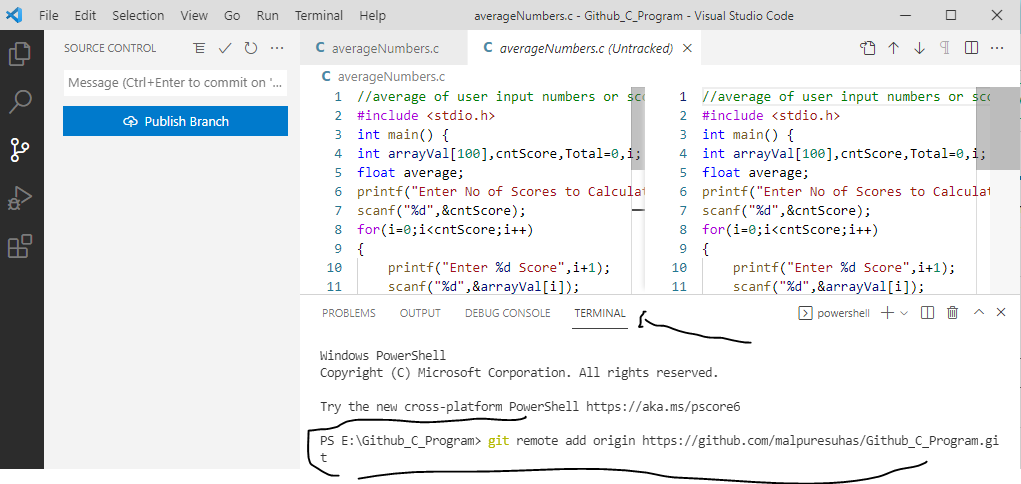
Copy the Above highlighted line ( Make sure it should contain your project name and username) and past it on visual studio code terminal and press enter. like below
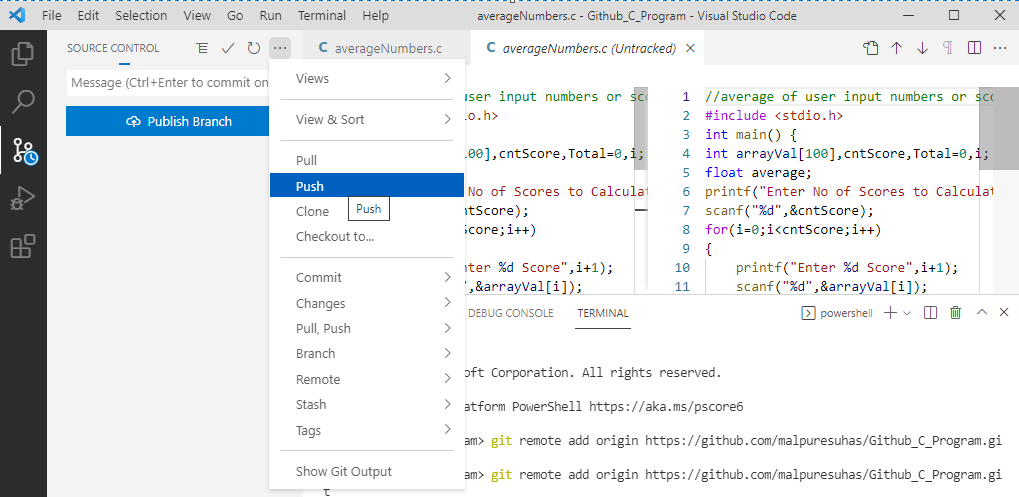
Now Visual Studio Code is now aware of where it has to push the code. So click on the menu mentioned below to push the code
The first time it will ask you user name and password again. You can provide it if asked.
To conclude after performing every step as mentioned as shown above it will be easy to configure Visual studio code with GitHub.
If you observe code is now available in GH
https://github.com/malpuresuhas/Github_C_Program/blob/master/averageNumbers.c